This guide covers how to get started with your new cPanel website hosting at GalacticNode! If you have any questions during the process, please don't hesitate to reach out to our support team!
Prerequisites
Before you get started, make sure you have the below:
- You must have an active cPanel website hosting with GalacticNode
- Your domain must be registered somewhere (either with GalacticNode, or a third-party registrar)
- Have your cPanel login details or client area details handy
Logging into cPanel
Before we can do anything, we need to log in to your cPanel account! There are two ways we can do this: either by using our username and password, or via SSO.
Option 1: Username & Password
- Open up the GalacticNode cPanel login page.
- Enter your username and password from your cPanel welcome email, then click login.

Option 2: One-click login via the GalacticNode client area (SSO)
- Login to the GalacticNode Client Area.
- Go to My Services / Active Services, select your cPanel product and click Login to cPanel.

Connecting your Domain
Now, we need to point your domain to GalacticNode; otherwise, your website won't be able to operate. You can either:
- Point the domain nameservers to GalacticNode (we manage DNS), or
- Keep using your registrar or Cloudflare and add the necessary DNS records yourself.
Pick one - don’t try to do both.
Option 1: Point nameservers to GalacticNode (easy & recommended)
Change the nameservers at your domain registrar to the GalacticNode nameservers listed in your welcome email. Once the nameserver change has propagated, GalacticNode will serve your DNS and your site should resolve to the hosting automatically.
If you are using GalacticNode as your domain registrar, you can follow our How to change your nameservers guide.
If you are using a third-party registrar, you'll need to follow their guide to change over your nameservers. In most cases, they will have a control panel where you can manage this, you may need to contact them if you are unsure.
Common third party registrars are linked below with their respective guides:
Option 2: Keep external DNS (such as CloudFlare)
If you keep DNS at Cloudflare (or another provider), add these records to make your website & mail work:
| Type | Name | Value / Target | Notes |
|---|---|---|---|
| A | @ (example.com) | <your server IP> |
Site root - can be proxied (orange cloud) if you want Cloudflare caching. |
| A | www | <your server IP> or use CNAME to @ |
If you use a CNAME, Cloudflare will manage it. |
| A | <your server IP> |
IMPORTANT: set this record to DNS only (grey cloud). | |
| MX | @ | mail.example.com |
Ensure MX points to an un-proxied hostname (like mail.example.com). |
| TXT | @ | SPF record suggested by cPanel | Adds SPF - see Email Deliverability in cPanel. |
| TXT | default._domainkey | DKIM value from cPanel | DKIM improves email deliverability. |
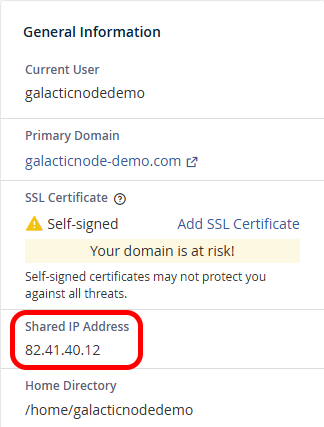
To find your server's IP address, you can go to the cPanel dashboard, and you'll see a value called Shared IP Address under the General Information section
Quick CloudFlare Rules
| Rule | Why |
|---|---|
| Set mail A record and any mail MX targets to DNS only (grey cloud) | Cloudflare’s proxy (orange cloud) does NOT proxy mail ports - if mail records are proxied mail will fail. |
MX must point to a hostname (eg. mail.example.com) - not an IP |
Keeps MX clear and manageable. |
| Use cPanel’s Email Deliverability tool to get SPF & DKIM entries | This prevents common delivery problems. |
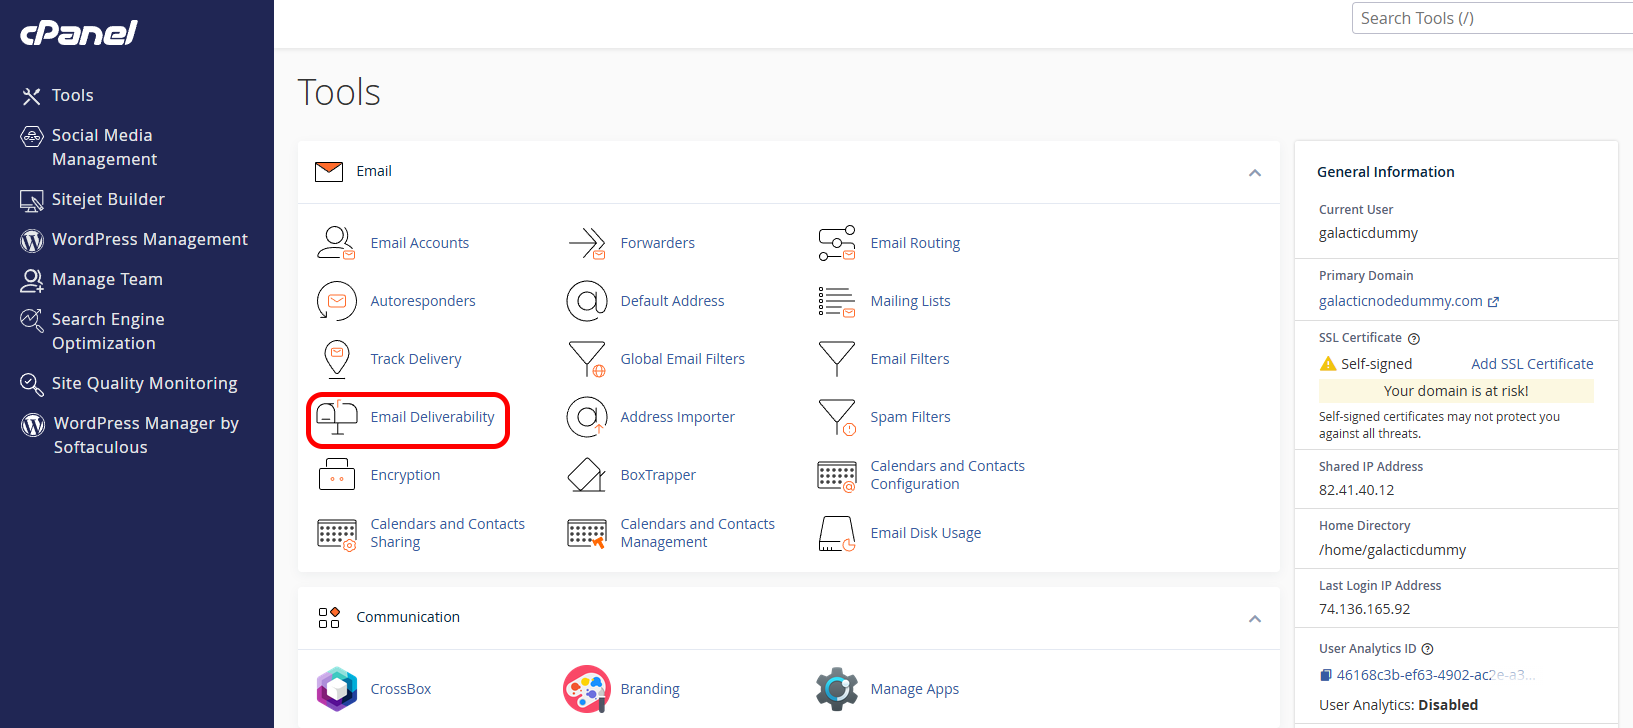
When adding the Email Deliverability rules, you can find these values on the cPanel dashboard, under Email Deliverability.
Uploading your website files
You can upload your site via File Manager (browser) or FTP / FTPS (client). Use the public_html folder for your primary domain.
File Manager (quick)
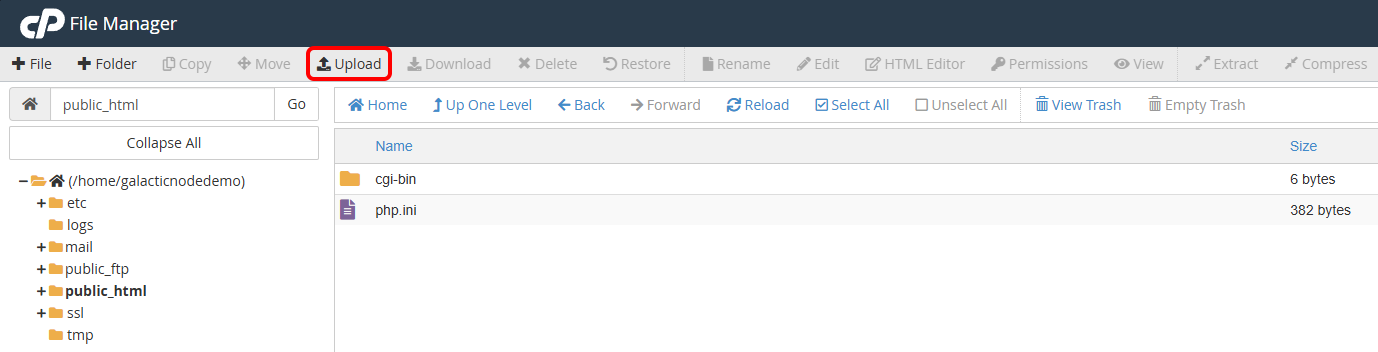
- Login to cPanel → Files → File Manager.
- Open the
public_htmlfolder (or the add-on domain folder shown in cPanel). - Click Upload and select files or a ZIP. If you upload a ZIP, right-click → Extract once uploaded.
FTP / FTPS (recommended for larger sites)
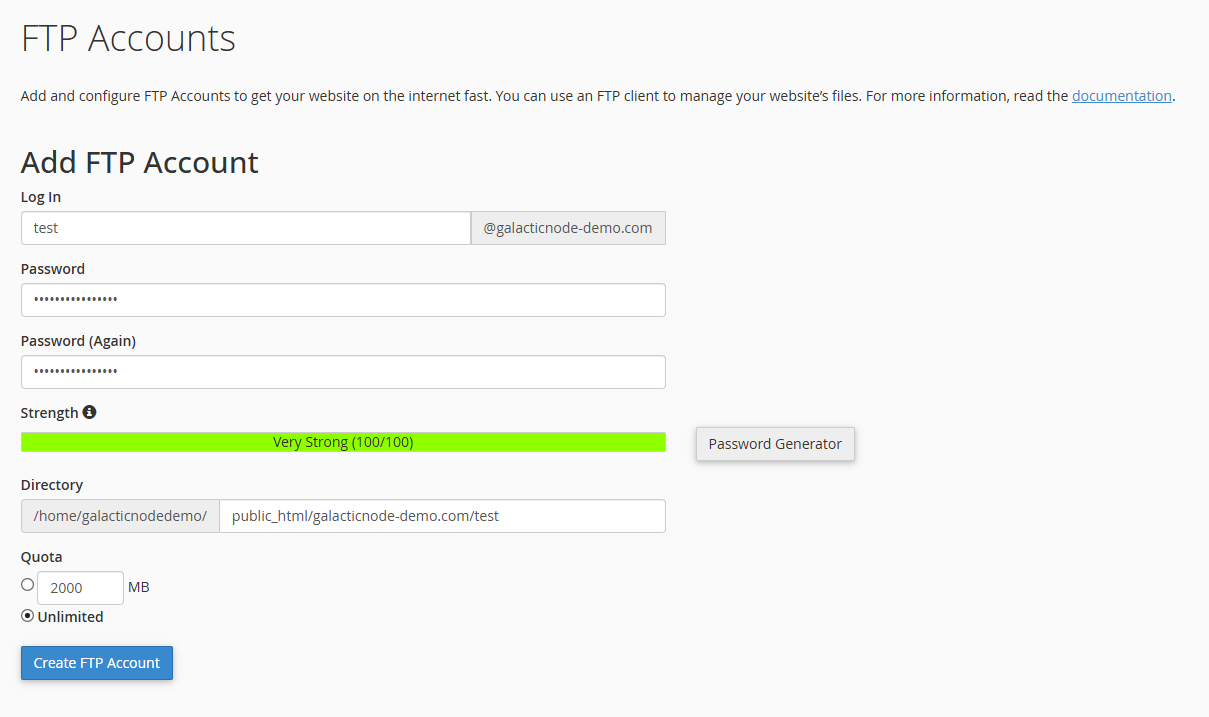
- In cPanel → Files → FTP Accounts, create a new FTP user (set the directory and password).

- Use an FTP client (FileZilla, WinSCP, Cyberduck). Typical settings:
Host: orbit.galacticnode.net (or your server host shown in cPanel)
Protocol: SFTP (recommended)
Port: 21 (or the port cPanel shows)
Username: ftpuser@example.com
Password: <your password>
- Upload to the
public_html(or the add-on domain folder).
Email Deliverability
To prevent your outgoing email being marked as spam, set up SPF and DKIM:
- Go to cPanel → Email → Email Deliverability.
- Run the install recommended records.
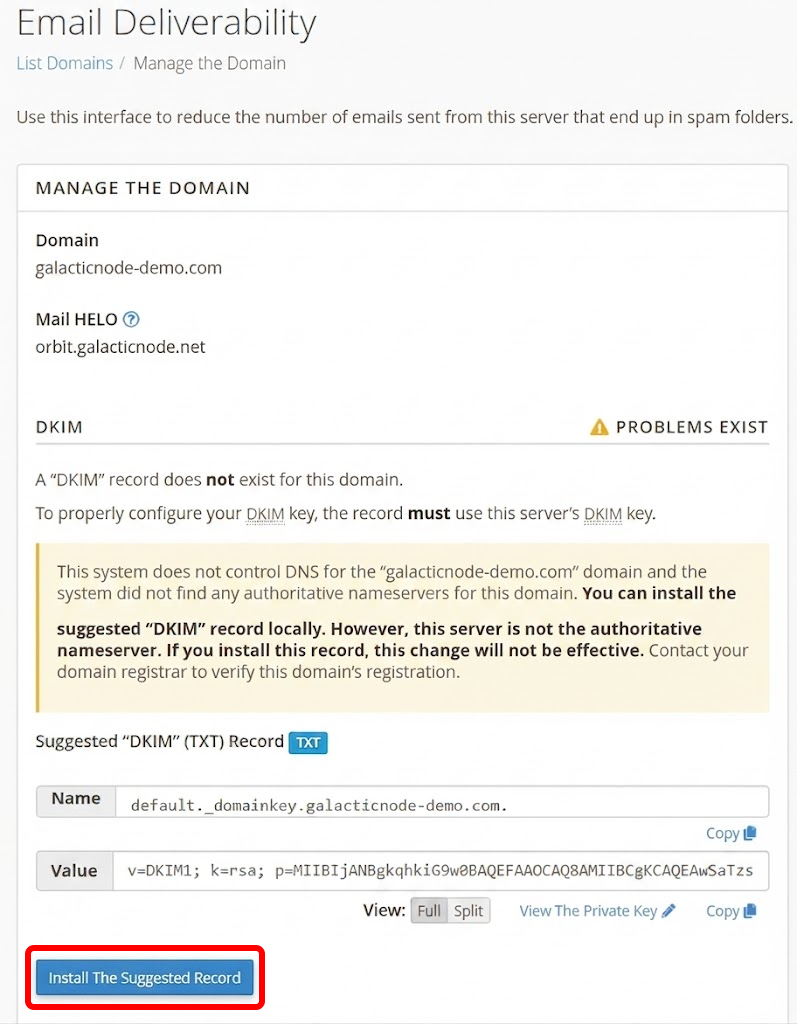
- If you are using an external DNS provider, copy any TXT values cPanel provides into your DNS provider.
Troubleshooting
- Site shows default page: files in wrong folder. Check
public_html(or the add-on domain folder). - Changes not appearing: clear Cloudflare cache (if applicable), then clear browser cache.
- Email not delivered: confirm MX,
mailA record, SPF & DKIM are present. Use cPanel Email Deliverability to check. - FTP fails: check hostname, username, password, and use SFTP - Check our How to FTP into a cPanel Account guide.
- If you need any further assistance, please contact our support team! We are here to help!
Additional Guides & Links
- Logging In To cPanel
- How to change your nameservers
- How to FTP into a cPanel Account
- How to change cPanel directory permissions
- GalacticNode Support